Improve your outdoor cooker and protect it for years to come with our easy Blackstone griddle seasoning guide.
Great food starts with a great griddle. And if you’ve ever used a Blackstone griddle, you know this brand is as good as it gets.
But before you start cooking up bacon, eggs, or burgers, you need to take a critical step – seasoning your griddle. This process protects your griddle, gives your food impeccable flavor, and saves you from the frustration of having everything you cook stick to the surface.
From the best oils to use to good griddle care, discover how to season a Blackstone griddle today. Here’s our guide.

What Does It Mean to “Season” a Griddle?
If you’ve ever seasoned a cast-iron skillet, you have a general idea of what it means to season a griddle. Seasoning involves using oil and heat to build a stick-resistant, protective coating.
How does that work? When you apply a thin, even layer of cooking oil or griddle seasoning (more on that in a minute) and heat it up, the heat from the griddle starts to burn off the organic compounds in the oil. As these compounds burn off, they leave behind a durable polymer coating.
That coating bonds to the cooking surface and also stops food from sticking. It forms a protective shell that shields your cooktop from scratches and damage.
The benefits don’t stop there, though. When your griddle is seasoned well, it distributes heat and cooks food evenly. It also adds a flavor you have to taste to believe!
Best Oil to Season a Blackstone Griddle
The most important thing you need for seasoning your new griddle is an oil with a high smoke point. In short, this means they can withstand high temperatures without burning. When seasoning, oils undergo a process called polymerization, where the oil forms a firm coating on the griddle surface. The best oils for griddle cooking are those with a high smoke point so they can go through polymerization without burning up.
The best oils for seasoning Blackstone griddles are:
- Canola oil
- Flax oil
- Olive oil
- Coconut oil
- Vegetable oil
- Shortening (a type of fat often made from a blend of vegetable oils)
Any one of these oils will work, but if you want the most durable and protective seasoning possible, go with Blackstone’s Griddle Seasoning (you can find it here on Amazon) – it’s made just for this purpose. It’s made from a blend of oils, including canola oil and palm oil, and is tailored specifically for use on Blackstone’s griddle products.
Before you start the seasoning process, you need two more things: paper towels and some tongs or heat-resistant gloves. Once you have everything you need, you can start!
How to Season Your Blackstone Griddle
Seasoning a Blackstone griddle isn’t difficult, but it takes some attention to detail to do it right. Here’s how to season your griddle so you can enjoy it for years to come.
1. Start With a Good Clean
If you’ve just pulled your griddle out of the box, it might look perfectly clean. But chances are good that it has at least some dust, debris, or oil left over from manufacturing and shipping. You don’t want that to get in the way of the polymer coat.
It doesn’t take long to clean the cooktop. All you need to do is mix water and a little dish soap in a bucket, pour it over the griddle, and rinse well. If your griddle isn’t brand new and you see some visible dirt, you may need to gently scrub it off before rinsing.
2. Pre-Heat Before Seasoning
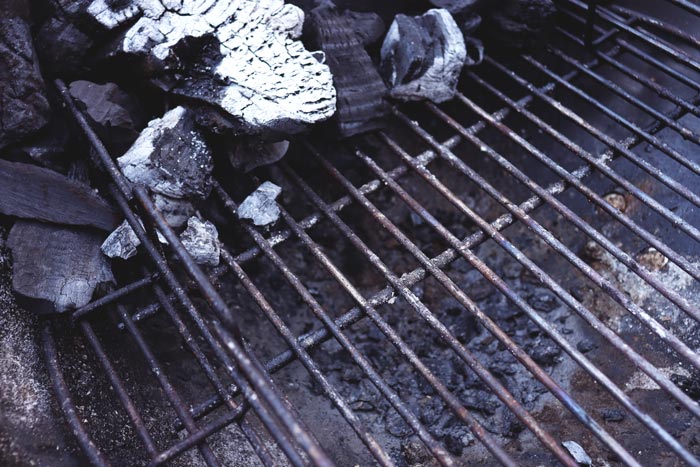
You want your griddle to be warm before you season it. To do this, turn all the burners to maximum heat and watch for the cooking surface to turn slightly brown. This should take about 10-15 minutes. Once the surface starts to turn brown, switch the burners off.
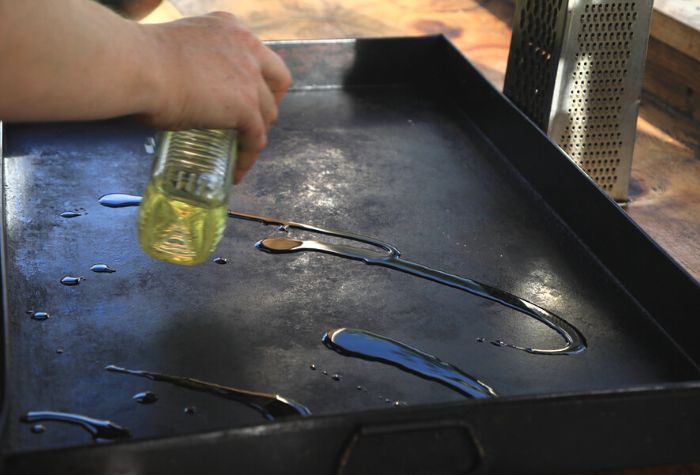
3. Coat the Surface
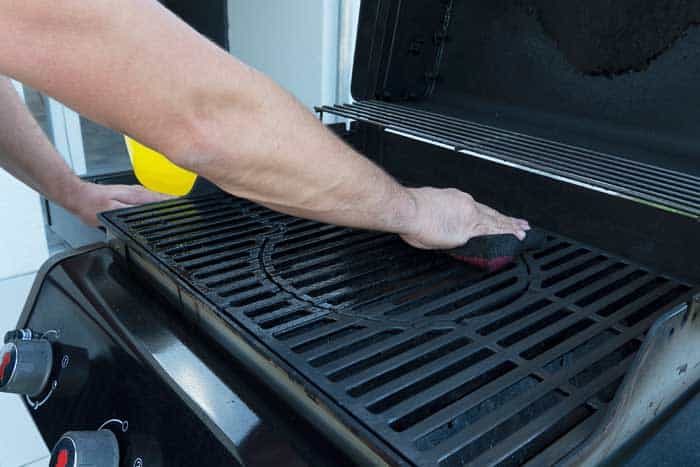
Now it’s time to give the griddle its first coating. Take your chosen oil and drizzle it over the surface. Then, using either the tongs or the gloves, take the paper towels and rub the oil across the surface.
Usually, you’ll only need about 2-3 tablespoons of oil. Make sure that you don’t leave any dry patches or oil puddles. The cooktop will still be hot, so be careful!
You want the coat to be as thin as possible – imagine you’re trying to use the paper towels to wipe off the oil. If you apply a thick coat, it will easily chip and lead to an unpleasant, sticky buildup on your cooking surface.
The seasoning process involves applying several thin coats of oil. Think of it like painting walls: you don’t apply one extremely thick coat. Rather, you apply one, let it dry, and then apply another.
During the coating process, avoid the common mistake of only coating the bottom of the cooking surface. Oil the sides, too – even the sides facing outward. Food might not touch this surface, but it may rust if you don’t season it.
4. Start Blackening
Once you have a thin, even coating, it’s time to turn the burners on again. Turn the heat all the way up and wait for the griddle to start blackening. You want it to reach the “smoke point.” This is when you start seeing smoke rising from the cooktop. That smoke is the organic compounds in the oil burning off.
It takes about 30 minutes for the griddle to reach this point, so be patient! Once it gets there, wait for the smoke to stop and then turn the griddle off.
5. Repeat the Process
It takes more than just one round to get a perfectly seasoned griddle. You should repeat the above process about 2-3 times, stopping when the griddle surface becomes a rich, dark brown.
6. Finish Up
Once your griddle has a smooth, darkened surface, you can stop seasoning for now. Turn it off, let it cool a bit, and coat it with one final layer of oil or griddle seasoning. This layer will help prevent the surface from rusting.
Do You Need to Re-Season Each Time You Cook?
Fortunately, once your griddle has been solidly seasoned, it doesn’t take much to maintain that seasoning. Each time you cook, the coating should get a little blacker and a little more stick-resistant. When you clean your griddle after each use and store it in a way that prevents rust, you shouldn’t need to repeat the multi-step seasoning process.
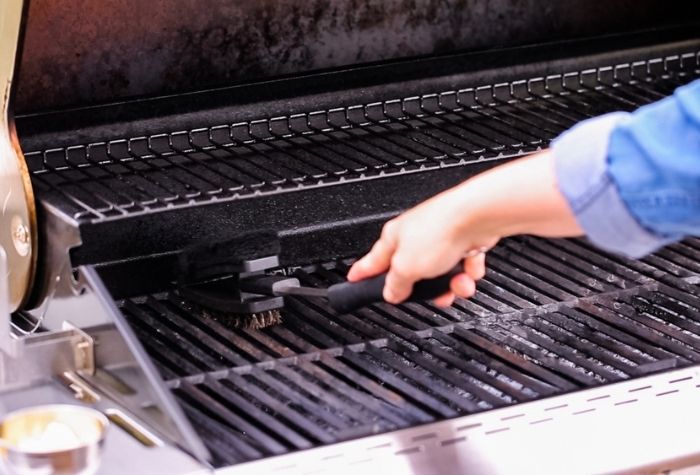
How Do You Clean a Seasoned Griddle?
After you cook, you want to remove any food buildup but without removing the seasoning! Fortunately, you can clean up your griddle and have it ready for the next use in a few simple steps. Here’s how to clean a Blackstone griddle:
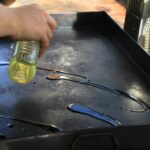
- If there’s any food stuck on the griddle, pour some water on it while the surface is still warm
- Wait for the griddle to cool down from hot to still warm
- Take a scraper or a metal spatula and scrape off any debris or buildup
- Wipe off the surface with a clean cloth or a paper towel
- If needed, gently rub the surface with a scouring pad
- Rinse and dry gently with a clean cloth
- Coat with a thin layer of oil before putting it away
Remember that when you’re cleaning your griddle, you have two main objectives: removing any buildup while preserving the seasoning. Some people prefer to clean it while the surface is still warm, as that may make it easier to dislodge anything stuck. There’s nothing wrong with that, but just make sure you don’t burn yourself!
How Do You Store Your Griddle to Protect the Seasoning?
Seasoning can help protect your griddle from rust and other damage. But if you want to keep your Blackstone griddle looking and performing its best, you need to take a few other steps.
Hot, humid climates can degrade your seasoning and make your griddle more rust-prone. If at all possible, store it somewhere dry and cool. At a minimum, invest in a heavy-duty cover to protect your griddle from the weather.
Some people prefer to store their griddle in a protective cover. However, if you do this, make sure you leave the zipper on the bag open a few inches to help aerate the bag. If moisture becomes trapped inside, the griddle might start to rust.
What If Your Seasoned Griddle Starts to Rust?
Rust is more than just a cosmetic imperfection. It can impact the flavor of the food you cook. In severe cases, it can even eat through your cooking surface.
To stop a small rust problem from becoming a big rust problem, you should take action as soon as you see rust start to develop. Surface rust can sometimes be removed with a metal scraper and a grill stone. Deeper rust might need steel wool or sandpaper (and a lot of elbow grease!).
In either case, you know the rust is gone when you see the shiny, spot-free metal underneath. Once you’ve removed the rust, you’ll want to re-season your griddle to protect the metal from sticking and further rust.