Ready for your next cook-off with your flashy new BBQ gear? Before you get going you’re going to need to clean and prepare it properly. Learn how with my guide to seasoning a new smoker.

You may have heard of ‘seasoning’ or ‘restoring’ a BBQ grill or smoker before. This is a really important stage that should be done before you use it. As tempting as it is to bust your new toy out and get going, it’s vital that you do this prior to using it.
The word ‘seasoning’ can be confusing here. Unlike with more general cooking, it doesn’t mean to sprinkle salt or black pepper over food, but instead means to clean the inside of your equipment.
Seasoning a smoker involves lightly coating its components in cooking oil to help protect it against rust and contaminants, before heating the chamber on in order to dry the oil.
There are a lot of different ways to season a smoker, and the best way might depend on the brand you’re using. However, I’m going to try and keep things simple by giving you the best one that I know.
If you have a vertical smoker then check out my specific guide on how to season a vertical smoker.
If you’re new to BBQ smoking or are just after a quick guide then I hope I’ve covered everything off so that you’re all set to get going on firing up your brand new piece of gear.
Here’s a step-by-guide to preparing it properly.
What do I need to clean my smoker?
Fail to prepare and prepare to fail. Luckily, a lot of what you need for cleaning your smoker you will either already have, or will be easy for you to get a hold of either in a local store or online.
You will need good old fashioned water, dish soap, cooking oil, a piece of fabric, and smoking wood. Don’t use any piece of cloth material that is likely to scratch the inner chamber or grates. Also, if you have a charcoal or offset smoker then you will also need coals and a means of lighting them.

Remove the main components
The ideal place to start is actually before you’ve assembled your smoker. Having it broken down into its separate components will allow you better access to them, and help you clean them better.
If you can’t disassemble it entirely, the most important component to be able to access is the smoker grates. You should be able to easily remove this much like you would with a BBQ grill, or an oven.
Start with the inner chamber
Clean the inside of the chamber body, grates and pans with dish soap and water. Use a delicate fabric to remove any excess water from the parts, and be careful not to scratch any of them. Leave to dry.
Pro tip: Use a delicate dish soap. This can act as a degreaser and help to remove any leftover manufacturing oil or grime from the component surfaces.
Apply cooking oil
Spray or wipe down the inside of the chamber with cooking oil. Only look to apply a thin and even coat over its surfaces. I use cooking spray for this, but a light layer of cooking oil is also fine.
Again, doing this while the smoker is unassembled is the best way to ensure that you work the oil into all surfaces, edges and corners of your chamber.

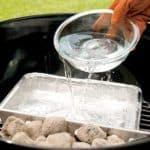
Assemble your smoker
At this point, re-assemble the parts as per the instructions supplied with your model. Just be careful to handle the components carefully in order to avoid removing any of the oil coating that you’ve just applied. Put the water pan in the foot of the chamber, but leave unfilled. Open the top and bottom vents.
Oil the outside of your smoker
Before we heat it up, we need to apply oil on the outside of the smoker itself. This step might strike you as a little odd, but just like with our cooking grates this helps to prevent the occurrence of rust.
Simply apply a very thin layer of oil over the outside coat of your chamber, using a smooth cloth.
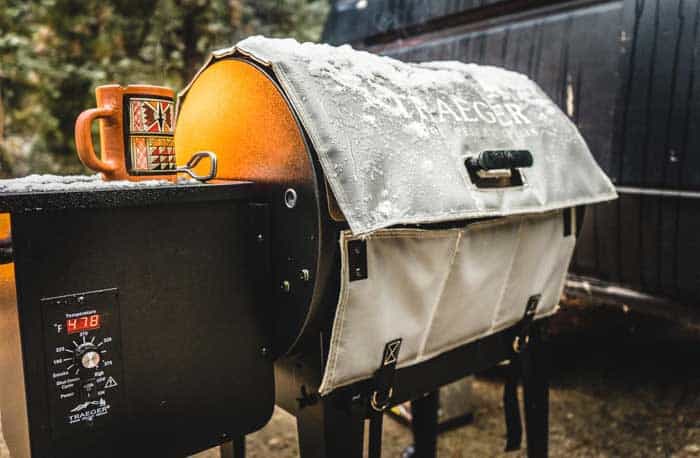
Ramp up the temperature
Before you start, make sure you know how to control the temperature of your smoker.
Turn your smoker on and gradually raise its temperature, increasing it every 5 or 10 minutes before arriving at its maximum temperature. Once it reaches that maximum, leave it running for 3 hours.
Note: Your smoker’s instructions might recommend a full cooking cycle, in which case it might suggest a different amount of time. If this is the case then follow their suggestion.

Why should you season a smoker?
When smokers arrive new, they’re likely to either contain or be coated in debris from their manufacturing. This might sound odd, but is actually fairly common.
This debris can come in the form of metal shavings, oils, cardboard, or even wood. Further to this, manufacturers often coat smoker components in oil to help prevent forms of rot from setting in while it’s sitting on the store shelf.
What seasoning allows us to do is remove all of this unwanted debris and preservatives, and close the pores of your smoker’s trays and surfaces.
Seasoning is essentially a way of cleaning your smoker prior to use, while also getting it into the ideal cooking state. Ultimately, it helps prevent any chemical aromas or flavors leaking into your food. Essentially we’re trying to ensure that your smoked food tastes as beautifully authentic as possible.
Furthermore, it helps act as a safeguard against future wear and tear by reducing the risk of rust setting in.
The main bulk of seasoning involves simply a soapy water with a soft fabric cloth. Give inside your smoker a rapid washing down with soapy water to remove any oil from the inside surfaces of the smoker. Be careful not to scratch the surface. Once you’ve finished, leave the smoker open and exposed to air in order for it to dry.
Part of seasoning a smoker relies on applying oil to its interior surfaces, particularly its racks. However, if you’re seasoning an electric smoker then be careful not to apply oil to its electric heating elements. Similarly if you’re using a propane smoker, avoid letting any oil come into contact with its gas lamps.
I recommend you use a generous amount of oil, yet definitely stop short of it resembling a stream of the stuff on its insides. We’re after a relatively thin layer here, not a pool of it!
The final stage involves heating up the smoker to get rid of any final bits of residue or debris inside it. While you could just blast it with a high temperature for a number of hours, what I recommend is to gradually raise the temperature to its maximum for 60 minutes or so before then leaving it at that temperature for a further couple of hours. Others might disagree, but this just feels like a much safer and smarter way of testing your smoker fresh out the box.
How often should I season my smoker?
BBQ smoking can be a messy business, so it’s really important to take good care of your cooking gear.
I recommending cleaning your grates after every single use. Yes that can be a bit of a chore, but it ensures good hygiene as well as helping protect your grates from more general wear and tear. Not to mention, any leftover bits of meat stuck to the grate will be pretty disgusting next time out!
The main chamber of your smoker however doesn’t need attention quite as frequently. It’s not in contact with food as much as your grates, if at all, so I recommend cleaning it 2 or 3 times a year. If you do it thoroughly then this should be enough to help prevent any unwanted buildup of grease or dirt.
What’s the best wood to season a smoker with?
One of the challenges with BBQ smoking is getting your choice of wood right, and this is even the case with cleaning too.
As part of the seasoning process, we need to let the smoker run for a while, and with this we need to match a wood with it. The truth here is that no wood is the wrong choice, in that no particular type of wood will season the smoker less well. What I would suggest is using a traditional wood that won’t leave an unusual aroma or flavor in the chamber. For me, that makes oak the best choice of smoking wood to go for.