Seasoning helps you protect your smoker against damage and rust. Read my step-by-step guide on how to season your new vertical smoker.

If you’re lucky enough to have a new vertical BBQ smoker and are raring to get started with it, just wait one second: Seasoning and cleaning it is the most important step in preparing it. Here are 3 easy steps to show you how to season your new vertical smoker.
Why do we season smokers?
As tempting as it is to get going with your brand new smoker, an important step you will have to go through before using it is seasoning it.
Seasoning is as important as cleaning it. In fact it is a type of cleaning.
If you haven’t heard the term before, it can be a little confusing as it doesn’t mean to rub salt or pepper on it, but instead it’s a phase of cleaning that happens prior to use.
In short, it requires coating your smoker’s surfaces and parts in cooking oil to help protect it against rust. After this we then heat it to dry it out and allow the protective layer of oil to set.
I have actually written before about seasoning smokers before, but I wanted to create a post dedicated to vertical smokers because they tend to be far bigger, and so far more challenging.
It’s not uncommon for vertical smokers to have as many as four, five, or even six racks, so the process can be labor-intensive. The results are well worth it though.
Here’s how to do it.
Step 1: Remove the racks
A deep clean will require really getting into your vertical smoker, and so the best way to do that is get the cooking racks out the way by removing them.
The upside of this is that because the racks are fairly manageable in size, you can simply take them inside and wash them with soap and water, before drying them off and taking them back outside to your smoker.
When cleaning them, use good soap, water, and a scrubbing brush that will really let you get at the grates. They might not come dirty, but we want to ensure that any residual particles or oil from the manufacturing process are removed prior to use.
Be sure to rinse them off well. I actually find the most practical way of doing this is with a hose, as it allows you to really get between the metal rows of the grates without causing a mess inside, as well as help remove all remnants of soap. Then wipe them down with a towel, and leave out to completely dry.
Once they are washed and completely dry, you can put them back into your smoker.
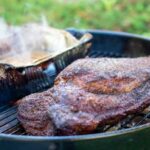
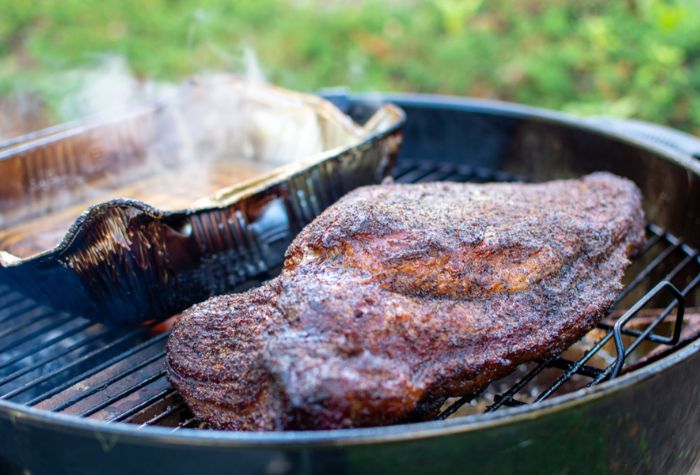
Step 2: Apply cooking oil spray
I mentioned that applying cooking oil to the inside of your smoker is the main part of seasoning, and this is where we really get going with it.
At this stage we want to use cooking spray to apply a really liberal amount of oil all across our grates, as well as inside the chamber of our smoker.
Using oil to clean a grill might seem odd. Why don’t we use water? In short, water and iron don’t get along. Using water will leave it prone to rusting. Cooking oil meanwhile is hydrophobic, meaning it repels water. This is great for cleaning smokers, because if we can apply a layer of oil over the surfaces of the smoker then we can create a protective guard against the water, preventing it from getting to the metal in our smoker. This ca significantly reduce the risk of oxidation occurring in the smoker, otherwise known as rust.

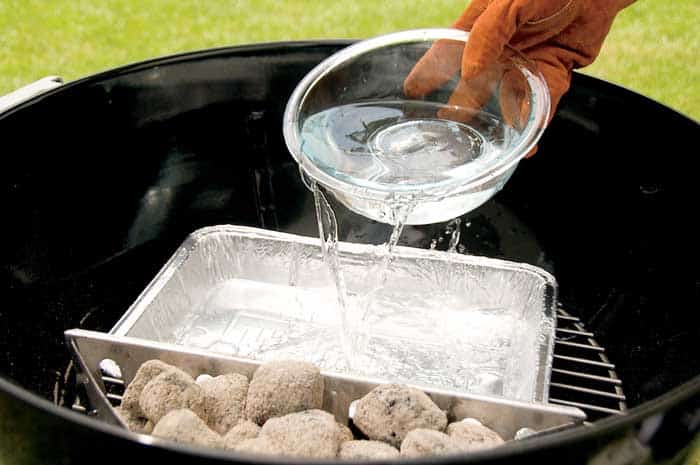
It might be easy here to be dismissive of the risk of water. After all, water doesn’t reside in hot places, right? Well, not exactly. Smoking in particular exposes food to low heat over long periods of time, and this can produce moisture in the chamber. This is particularly true if you also use a water pan (which, by the way, I highly recommend). This water can then condense on the inner walls of the chamber.
What also adds to the presence of water is the meat itself. As it cooks, moisture is squeezed out of the food, which then either becomes water vapor or drips as run-off. In either case, it will add to the water within the chamber.
Finally, another factor is wood. Not everyone uses wood chips in their smoking but I do (and would always recommend it). When wood burns it creates two main things: Carbon dioxide and water vapor.
All of the above contributes to a lot of water within a small space, and if we don’t take measures to protect the chamber against it then we are at high risk of ruining our smoker with rust.
One thing to pay attention to when picking your cooking oil is to use one with a high smoke point. This means that it can tolerate a relatively high cooking temperature before smoking up. Oils like extra virgin olive oil don’t have this, and are prone to breaking down at relatively low temperatures, running the risk of imparting unpleasant flavors on your grill. Instead I’d try to use canola oil, which is a much more robust cooking oil. Here’s what I mean.
Spray a generous layer of the oil all over the smoker. Avoid applying it to the insulation gasket, just because it might reduce its impact at insulating your grill. It’s not the end of the world if it’s touched by any oil, but I’d just try to avoid it if possible.
The reason why I recommend spray over an actual oil is just because of convenience and efficiency. Sprays ensure a better amount of coverage across the inner panels and grates of your chamber, but also it’s just easy (and dare I say, fun) to do.
Once you have covered one surface, allow the oil to sit while you do the remaining surfaces inside your grill. Apply liberally. Better to use too much than too little. It’s not unusual to empty an entire can on it.
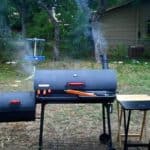
Step 3: Heat up the smoker
Now it’s time to heat up the smoker. We want to do this with the oil still on the surfaces of the smoker, so don’t wash the oil off.
Use a chimney starter to light your coals and place them in the smoker. You will need to place them either in the bottom part of your chamber, or even through a chute, depending on your smoker. So be sure to consult your smoker’s instruction manual here.

Photo: Michael Trump
The purpose of heating up the smoker here is important. By heating it up with the oil on it, it helps the oil dry into the pores of the metal, helping to create a semi-permanent protective coat. It also helps to allow any excess oil to run off and drip off as run-off, leaving us with a seasoned smoker that’s ready to go.
A quick word on wood chips for smoking here too. You don’t need to use wood chips for seasoning your grill. Wood essentially is just a means of imparting extra flavor on meat when you smoke. However, if this is a brand new smoker then you might want to consider it. Seasoning a great excuse to learn how to use your smoker and get to grips with it. If you want to use seasoning as a practice run, then I’d try adding some wood chips just to help you learn how to make the most out of it.
Ensure that both sets of vents are open, and leave it to get going for a few hours, with a good amount of heat.
As a rough guide, I say to let your smoke go for 2-4 hours. For me there isn’t a hard and fast rule for when seasoning is done, however a guide is to check on the color of your grates. If they start off silver then try to allow them to turn a brown or dark color. This is usually a good indicator that the oil has dried out and created a good protective layer on the grates.