This foolproof smoking technique might just be the best way for barbecue beginners to achieve tender and juicy smoked brisket.
The 4-2-10 brisket method is designed to be a foolproof method for smoking brisket that removes a lot of the external factors that can impact the quality and cook time of the barbecue classic.
This is not competition-level barbecue by any stretch, and more seasoned BBQ fans might find the limited amount of smoke ring and bark a little suspect. However, if you’re new to smoking meat at home and want to give brisket a try then this method is a great place to start.
You will need a lot of time here (although you can schedule the 10-hour portion of this to take place overnight) and I also recommend you use a smoker that isn’t prone to temperature fluctuations, such as an electric smoker or vertical pellet smoker.
Beyond that, this is a beginner-friendly approach to smoked brisket that never fails to deliver outrageously tender, juicy brisket. This is everything you need to know about the 4-2-10 method.
What is the 4-2-10 Brisket Method?
The 4-2-10 method for smoking brisket involves a three-step process designed to simplify the cooking while ensuring the brisket becomes tender, flavorful, and juicy. It can be broken down into three phases:
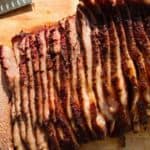
- The First 4 Hours: The brisket is smoked at 225°F (107°C) for 4 hours. During this stage, the beef’s connective tissue will start to break down, and the meat will turn tender, while a bark will begin to form on the meat’s surface
- The Next 2 Hours: The smoker’s cooking temperature is increased to 285°F (140°C) to help render the meat’s fat more aggressively while also enhancing the bark on the beef’s surface.
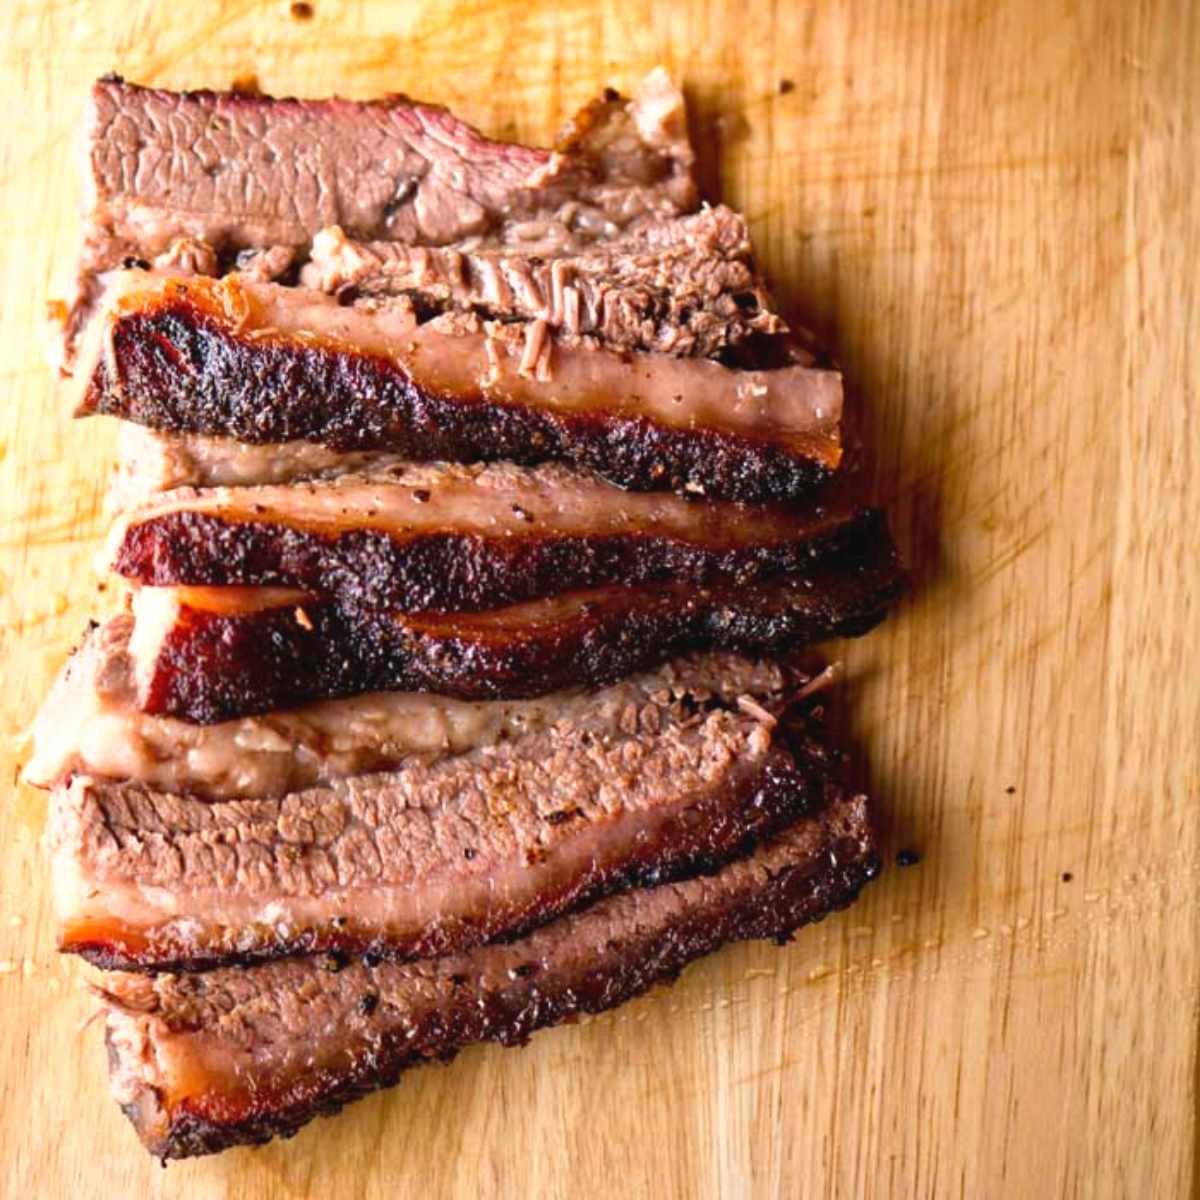
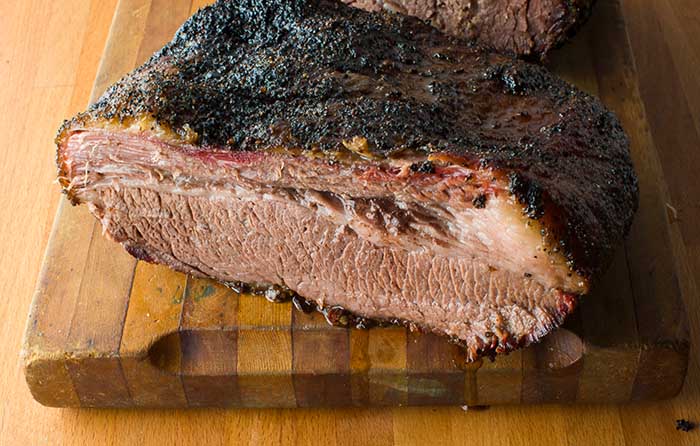
- The Final 10 hours: The brisket is then coated in drippings for added moisture before it’s wrapped in butcher paper and placed in a steam bath. It’s then smoked at a lower temperature of around 150-190°F (65-88°C) for 10 hours. This long, low-temperature stage helps break down the connective tissues in brisket while also retaining moisture and flavor.
Pros & Cons of the 4-2-10 Method
The 4-2-10 method for smoking brisket is designed to be a foolproof way to barbecue cook brisket. But, as with any method, it has its own unique set of advantages and disadvantages:
Pros
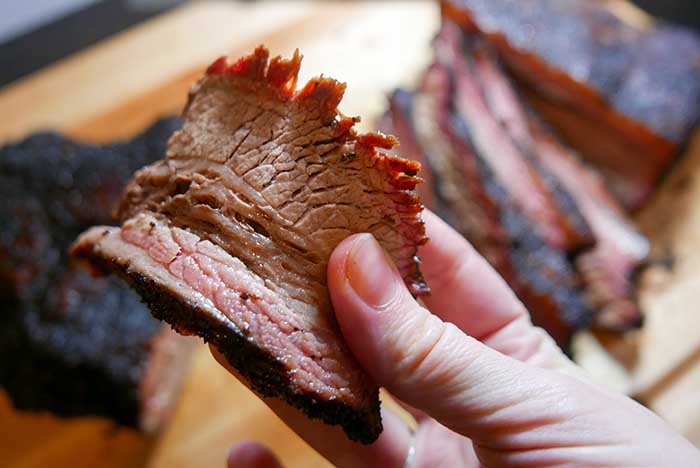
- Tender & Juicy Meat: The final long, low-temperature phase of the smoke is particularly effective at helping break down the tough muscle fibers in the meat, while simultaneously locking in its moisture.
- Flexibility in Timing: Because the last phase holds the brisket at a good temperature for so long, it gives you much more flexibility to decide when you want to serve it.
- Works with Cheaper Grades: This method has been shown to work well with lower grades of brisket
- Newbie-Friendly: Despite its long cooking time, the 4-2-10 method is particularly well-suited to barbecue beginners who need a straightforward process that limits the impact of external methods that traditional brisket-smoking methods entail.
Cons
- Lack of Bark: The method involves a lot of wrapping, which will limit the amount of bark that develops on the meat’s surface
- Overly-Tender: The long final stage can go too far, yielding a brisket so tender to the point that it’s soggy.
- Awkward Timing: Despite the flexibility the method is intended to give you in regards to timing, if you plan your final stage to take place overnight, your brisket will be ready to serve in the morning. Not even the most ardent of BBQ fans want brisket for breakfast.
How to 4-2-10 Smoke Brisket
Stage 1: The First 4 Hours
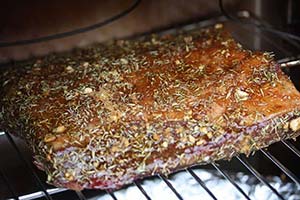
Fire up your smoker to 225°F (107°C). While it preheats, prepare the brisket by trimming any excess fat (although be sure to leave a fat cap of about ¼-½ inch). Pat dry with paper towels before applying a simple dry rub of equal parts kosher salt and black pepper.
Once your smoker is at temperature, place your brisket fat-side down on the smoker grates, allowing enough space around it to allow for proper smoke circulation. Smoke for 4 hours.
Important: Place a large aluminum pan under the grates, directly below the brisket. This will catch dripping from the beef as it cooks, which we’ll be able to repurpose in the third stage of this cook.
Stage 2: The Next 2 Hours
After 4 hours, a bark should have started to form on the surface of the brisket. However, there may be pools of moisture form on the surface, so to help dry them we want to ramp up the smoker temperature a touch.
Increase the temperature of the smoker to 285°F (140°C) and smoke for 2 hours. At the end of this phase, the brisket’s internal temperature should be approaching 170-175°F (76-79°C).
Stage 3: The Final 10 Hours
Lay out a large sheet of butcher paper and remove the aluminum pan (from this method’s first stage) from the smoker. It should have plenty of beef drippings in it for us to use. Use a basting brush to paint the drippings onto the inside of the butcher paper.
Then, remove the brisket from the smoker and carefully place it in the center of the butcher paper. Tightly wrap the brisket with the butcher paper and beef drippings.
Finally, place the wrapped brisket on top of a rack placed in a large pan. Pour a cup of water into the pan to create a bath below the rack. Then, cover the pan tightly with aluminum foil, sealing the foil tightly around the edges of the pan.
Place the brisket pan back in your smoker, and reduce the smoke temperature to 150°F (65°C). Smoke for 10 hours, or overnight
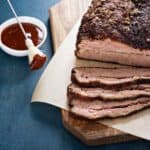
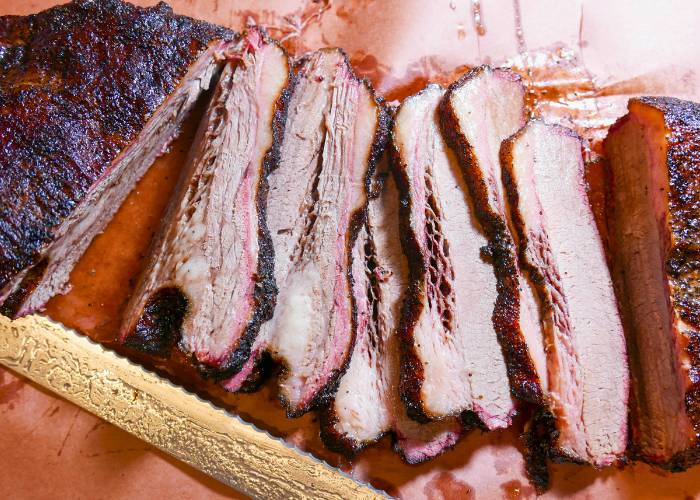
After 10 hours, pull the brisket from the smoker and let it rest for 1-2 hours. After you’ve rested it, unwrap it, slice it, and enjoy it right away!