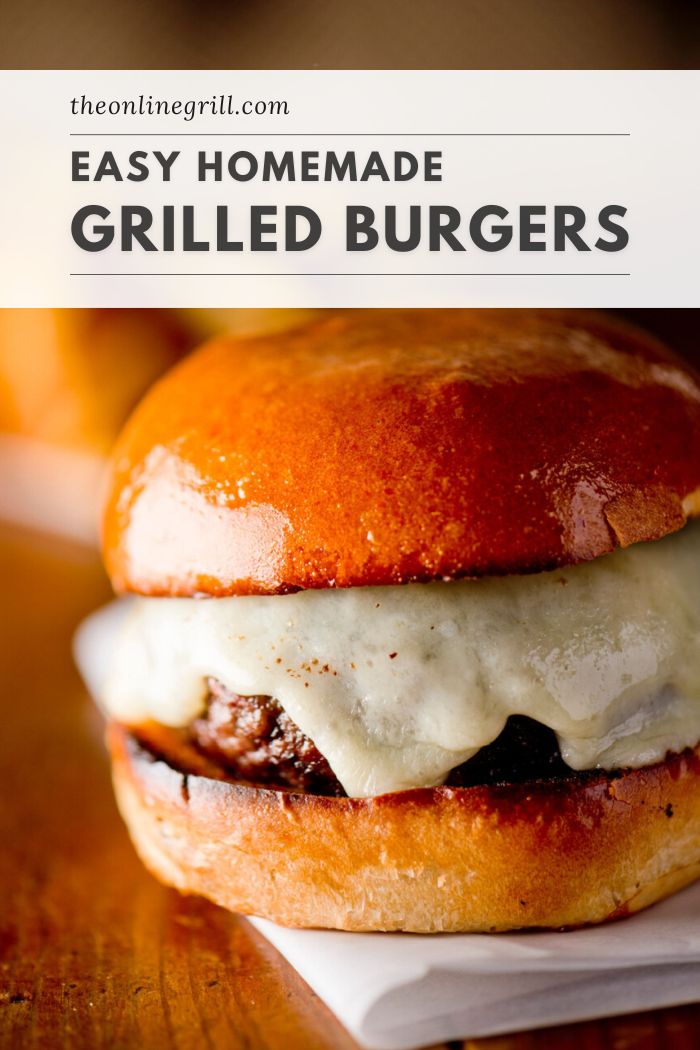
Delicious grilled hamburgers made with homemade ground beef patties and flame-seared on the grill. These juicy burgers are packed with juice and flavor, and better than anything store-bought. Discover how to make hamburgers from scratch today.
Is there a food more synonymous with grilling than the humble hamburger?
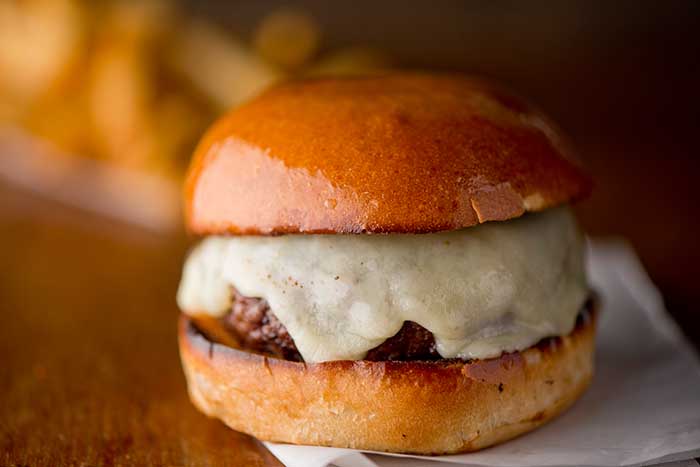
Nothing quite beats a juicy flame-grilled burger on a perfectly toasted bun, but mastering the skill of becoming a burger boss can be trickier than you might think.
From meat grinding tips to topping ideas, here’s how to make burgers from scratch.
Food Safety
When it comes to working with and handling raw meat, we need to ensure that we are doing so safely to protect ourselves from food poisoning and illness.
Risks of Handling Ground Meat
The main health risks we’re likely to encounter when making homemade burgers come from a bacteria called e.coli. E.coli is often found on the outside surfaces of beef.
While a quick high-heat sear will destroy this bacteria on steak, this isn’t so easy with burger patties. Processing the meat through a grinder can result in the surface bacteria can then be transferred to the inside of the meat.
Avoiding Contamination
The simplest way to avoid the risk of contamination is by sticking to the following guidelines:
- Keep raw meat refrigerated and below the ‘Danger Zone’ temperature of 40°F (4.4°C)
- Wash your hands thoroughly before and after handling raw meat
- Thoroughly clean any utensils or equipment used to prepare raw ground beef with hot soapy water and rinse well.
- Cook ground beef to a minimum internal temperature of 160°F (70°C)
- Use a separate plate to transport or hold raw patties and cooked patties

Best Beef Cuts for Burgers
There is a myriad of different cuts of beef that you can use to make homemade burgers. Some cuts are more flavorsome while other cuts may be leaner, but there’s one thing all cuts of meat need to make a good burger: Fat.
Why Fat Content is Important
Fat is mixed into ground beef to help add flavor and moisture. When buying ground beef, you’ll see the fat content displayed as a fat-to-lean ratio. So, for example, the leanest ground beef you can buy is 95/5, meaning it’s 95% meat to 5% fat.
The more fat that meat contains, the more grease it’ll produce as it cooks, and the more it will shrink. Usually, this wouldn’t be ideal, but with beef burgers, we want them to stay juicy once cooked (no one wants a dry hockey puck burger!), so we want to opt for a higher fat content of around 20-25% where possible.
The Best Cuts of Beef for Flavor
The muscles that produce cuts with the most flavor are the ones that are worked the most. The only issue is that the more a muscle is worked, the tougher it becomes.
While this would be an issue if we were looking for a cut suitable for a steak, when looking for a cut to turn into ground beef, it doesn’t matter too much. The grinding process tenderizes the meat to a point where we don’t have to worry about it being tough.
- Chuck is the best beef cut to use for homemade burgers. Thanks to its rich flavor and healthy fat marbling, beef chuck provides the perfect fat-to-lean balance we want for burger patties.
- Brisket presents an unmistakable beefy flavor, as well as high fat content
- Short rib has a rich flavor and high-fat content, making it perfect for burgers. It’s great when blended with chuck or round. Make sure you buy it bone-out!
- Round is a very lean and cheap cut of meat. It’s great to add to a blend that might be a bit fat-heavy.
- Top sirloin has a good flavor for a relatively lean cut. Blending it with brisket or short rib can make for a brilliantly balanced burger.
Grinding Meat for Burgers
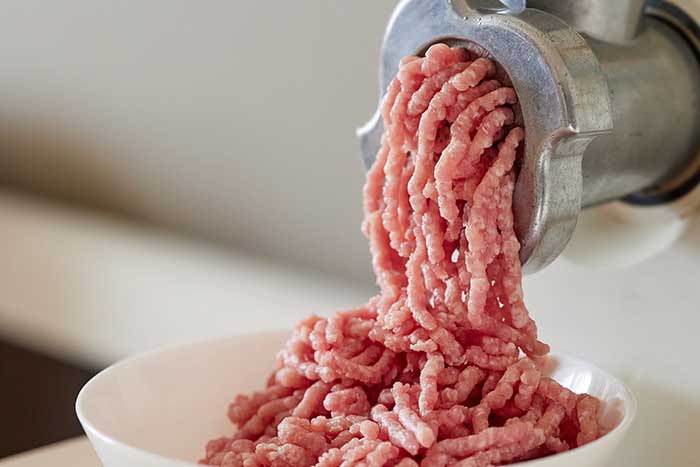
It’s easy enough to go to the store or the butchers to pick up a pack of ground beef to make your burgers, but why go for easy when you could instead create your own bespoke ground beef blend to make delicious burgers exactly to your liking!
Why You Should Grind Your Own Beef
If you opt to grind your meat for homemade burgers, you know exactly where the beef has come from, what cuts have been used, and the fat content.
Not only does it give you more of a say over the meat and blend quality, but you also know that it’s freshly prepared and also works out more cost-effective than buying store-bought ground beef.
How To Grind Meat For Burgers
Now, before you say it, I know what some of you are thinking – ‘How am I supposed to grind my own beef to make burgers? I don’t have a meat grinder/grinder attachment for a kitchen aid/the space for a grinder/the money for a grinder’.
While it is handy to have a meat grinder in order to make your own burgers, it isn’t the end of the world if you don’t have one – there are ways to do it with and without a grinder, and we’re going to cover each one.
The main thing to remember, regardless of what method you use, when making ground meat is that we want things to be cold. Not just cool, but ice cold. If you try to grind meat when it’s warm, it’ll just turn into a mushy paste, so we want to keep everything (the meat, grinding utensils, bowls) as cold as possible so that we can create a nice texture of ground beef.
Using a Meat Grinder to Make Ground Beef
To ensure that your grinder is cold enough, you’ll want to place all the components in the freezer for at least an hour before use.
- Cut your meat into 1” cubes and place them in the freezer for around 20-30 minutes until the meat starts to firm up – we don’t want it fully frozen, just to the point where it doesn’t ‘give’ if pressed with your finger. Spread the cut chunks out on a baking tray and place them in the freezer (this helps them all chill evenly and stops them from clumping or sticking together)
- While you wait for the beef to firm up, prepare the bowls you’ll use to catch your ground meat. We need it to stay cold and out of the ‘danger’ zone temperature as we grind the meat; the easiest way to do this is by catching it in chilled bowls.
- Get two mixing bowls that can fit one inside the other. Fill the larger bowl with ice and a small amount of water, then place the other bowl inside the ice bowl.
- Take your meat grinder out of the freezer, put it back together if it’s in pieces, and place the bowls underneath to catch the ground beef.
- Remove your beef from the freezer and run it through the grinder twice. The first time with a course disk and then the second time with a slightly finer one. This will ensure that you get the best consistency and blend for your beef mix.
Making Ground Beef with a Food Processor
Using a food processor to make ground beef follows the same setup as the grinder instructions – cube and chill your beef until firm, prepare chilled bowls and, if possible, take the parts of your food processor (that will come into direct contact with the meat) apart and put them in the freezer to chill.
- Work in small batches and pulse the cubes of meat in the blender until it is finely chopped (around 20 pulses should do it).
- Put the chopped meat into the chilled bowls and add the next batch; repeat until done.
Making ‘Ground’ Beef By Hand
When preparing beef to make burgers by hand, you end up with more ‘finely chopped beef’ rather than ‘ground beef’, but it will still work fine.
- Place your full cuts of meat in the freezer for around 15 minutes. It needs to be cold but not too firm/starting to freeze as we need to be able to chop through it safely.
- Using a meat cleaver, chop the meat until you reach the desired consistency.
- If you find the meat is getting sticky or too ‘loose’ to chop, pop it back into the freezer for a few minutes. Once it has become a bit more firm, you can chop it further.
How to Make Burger Patties
Now that you’ve got our ground beef sorted, it’s time to move on to forming the patties!
Before starting, make sure your work surface is clean and lined with a sheet of wax paper (so that the meat doesn’t stick to your work surface), your hands are washed, and the ground beef mixture is as cold as possible.
- Divide Your Ground Beef Mixture: Divide your mixture into even portions; it can help to use a scale to do this. For reference, burgers will usually range from 4 ounces (a quarter pounder) to 6 ounces.
- Form and Shape Into Patties: Use your hands to gently form and shape the ground beef into a patty shape. You’re aiming for a disc shape that holds together by itself, but that isn’t too tightly compacted. Try not to overhandle or overwork the meat – this can make it dry out and lose flavor.
- Make an Indent: Once you have your patty shape, take your thumb and make a small indentation in the middle.
- Place in the Fridge: Put your shaped patties into the fridge and allow to chill for at least 30 mins before cooking. This way, they will hold their shape when they go on the grill and won’t fall apart.
Bear in mind that the higher the fat content of the mix, the more the burgers will shrink when cooked.
Why Do We Make An Indent? This is done to ensure that the burger holds its proper shape when cooking. Meat can swell when it cooks and shrinks, by adding an indent to the patty, it stops it from swelling and ensures all the meat cooks evenly.
Seasoning & Toppings
Depending on how you want your burgers to taste, you might want to add some seasoning or extra ingredients to bring out the flavor.
Seasonings
If you’ve chosen your cuts of beef purely for taste, you might not want to add any extra seasoning and just opt for a sprinkle of salt and pepper on the patties before they go on the grill.
Of course, you can always add extra herbs and spices to your burgers if you’re aiming for a certain taste, but if you are using dry seasoning, it’s important to add it to the outside of the burger before cooking rather than adding it to your ground beef mix.
Toppings
There are plenty of recipes online that suggest different ingredients that can be added to ground beef to make the ultimate burger; some of the most popular are:
- Diced onions/garlic/peppers/chilies
- Chopped bacon
- Shredded cheese
- Sauces such as Tabasco, Ketchup, Mustard, Worcestershire
While they are all great additions to a burger, it’s usually better if they are added after cooking. Adding any extra ingredients to your ground beef can affect the cooking time and finished texture of your patties.
Do You Need To Use a Binder?
If you do decide to add other ingredients to your ground beef, such as onions, chilies, peppers, or any kind of liquid or sauce, you might need to add a binder to help keep the mixture together.
If you’ve added wet ingredients and the mixture has become loose, you’ll want to add something like breadcrumbs. If you’ve added dry or course ingredients and the patties fall apart, you’ll want to add a beaten egg to the mixture.
How to Grill Burgers
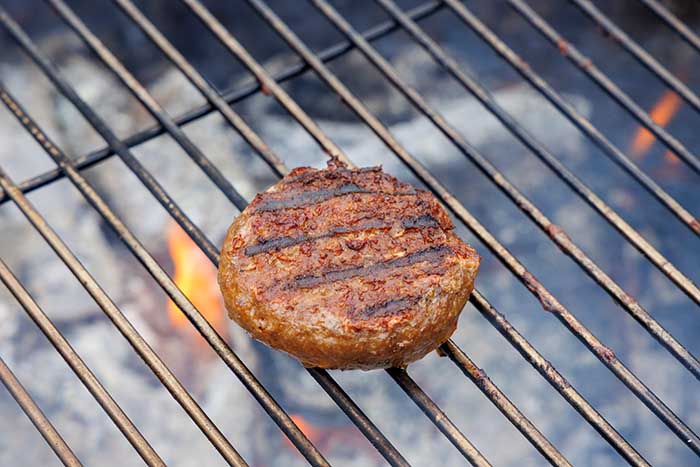
Regardless of whether you are using a gas or charcoal setup, the main thing to remember when grilling burgers is that the grill needs to be hot. Burgers are a quick-cooking food, so we want the grill to be hot enough to sear them.
- Place burgers on a hot grill – Aim for around 375-400°F / 190-204°C
- Flip when you see pink juices forming on the top – This is the myoglobin being pushed to the surface
- Keep an eye on the time – Thin burgers should only take around 2-3 minutes on each side, and thick burgers should be around 4-5 minutes per side.
Quick Tips
Only flip a burger once
Cold burger patties that are fresh on the grill hold their shape well, as do cooked burger patties. The one time they don’t hold together well is when one side is cooked, the other side is almost cooked and the middle is still raw. This is why you should only flip your burgers once.
When you know the bottom is cooked, you can flip it over as you know it’ll hold together – then it’s a case of waiting for that other side to thoroughly cook before removing it from the grill.
Don’t press down on burgers with your spatula
Although it can be tempting to push down on a cooking burger with your spatula so that you can really hear it searing, it doesn’t actually help it cook any faster. Instead, all it does is squeeze out the juices and flavor that you’re trying to keep inside and could potentially create a flare-up.
Grilling Burgers With The Two-Stage Method

We’ve talked extensively in other posts about how the two-zone method works as a way to help you control the temperature in your grill. Many people in the grilling community favor using a two-zone grill set up to produce perfectly cooked burgers with the Two-Stage Method.
With two-zone cooking, you have a hot, direct heat side of the grill and a lower temperature, indirect heat side of the grill. When using the Two-stage method for cooking burgers, you first put the patty onto the unheated side. The ambient heat on this side will start the burgers cooking at a slower and more controlled pace; you leave them on the indirect side until the internal temperature reads within 20°F of your goal temperature.
As we want to make sure our food is safely cooked, we’re aiming for a finished internal temp of 160°F, so we would move the burger when it hits 140°F
Move the burger onto the direct, high heat side of the grill to sear them and finish cooking once they have hit an internal temperature of 160°F
Using the Two-Stage method for cooking burgers can help if you have problems with your burgers ending up overcooked when just using direct heat. This is due to ‘carryover’ cooking, where the internal temperature of food continues to rise even after it’s been removed from the grill. This rise in temperature results in the meat cooking for longer and becoming overdone.
Internal Temperature Guide
The easiest way to tell when a patty is done cooking is by going off your burger’s internal temperature, so it’s handy to have a meat thermometer nearby when grilling.
The minimum internal temperature considered safe by the USDA is 160°F. This is classed as being ‘well done’, and the meat will be gray/brown all the way through.
Some people might say that they prefer their burgers to be a little less done so that they aren’t overcooked, but anything less than ‘well done’ takes you into the territory of being in the unsafe temperature zone and runs the risk of causing food poisoning.
Leftover Hamburgers
Sometimes leftovers can be the best part of a meal! If you’ve been a bit overenthusiastic with the grilling and have cooked burgers left over after a BBQ, they can be safely stored in the fridge for 3-4 days and frozen for up to 4 months.
Want to be creative with your patties? Check out our leftover hamburger recipes for delicious ways to reuse your ground beef.
How to Safely Reheat Leftover Burgers
You’ve probably noticed a bit of a trend in this post about us saying how important it is to ensure you are handling and cooking ground meat properly to make sure that it’s safe to eat, and reheating leftovers is no exception!
We’ve got from raw beef to ground beef and to cooked beef safely, so it doesn’t make sense to be slapdash with our leftovers preparation.
The first thing to do when preparing leftover hamburgers is to take them out of the fridge and let them warm up to room temperature (for about 10-20mins). Letting them reach room temperature means that they will reheat more evenly.
Reheating in the Oven – Set the oven to 400°F and place the patties directly on the oven rack/shelf with a baking tray on the shelf below to catch any dripping fat. Leave them to reheat for 3 minutes before flipping them over and waiting a further 2 minutes, or until they reach an internal temp of 165°F
Reheating in a Frying Pan – Place a non-stick frying pan on the stove and set it to medium-high heat. Put your patty/patties in the pan and add three tablespoons of water (be careful of any spitting); the water will create steam which stops the patties from drying out. Cover the pan with a lid and leave the patties to cook for 5 minutes. Remove them from the pan and set them on a plate lined with a paper towel to drain any excess juice before serving.
Microwaves might be the quickest way to reheat something but they aren’t the most consistent; they will often heat things unevenly, resulting in hot spots, and can dry foods out, leaving them chewy. However, if they are your only option for reheating burgers, here is how to get the best results.
Reheating in the Microwave – Place your patties on a microwavable plate and add a teaspoon of water over each one to help prevent them from drying out. Use the ‘reheat’ function to start the patties warming and flip them over after 1 minute. Once each side has been heated, test the temperature by pressing your finger against the burger. If it feels hot enough, they are fine to come out; if not, repeat the ‘reheat’ process.

Grilled Hamburgers
Equipment
- digital meat probe
- canola oil
Ingredients
- 1 ½ lbs ground beef
- kosher salt
- 4 burger buns
- 4 slices burger cheese
- 1 large yellow onion thinly sliced
Toppings
- lettuce
- tomato
- yellow mustard
Instructions
- Fire up your grill to medium-high heat, around 375-400°F (190-205°C)
- Divide your ground beef into 4 evenly sized portions, each weighing approximately 6oz
- Form each portion into a loose ball. Gently flatten each ball into a disc-shaped patty. Use your thumb to make a small indent into the center of each patty. Season both sides with kosher salt.
- Once grill is warmed up, carefully arrange patties on grill grates. Ensure they are not touching.
- Grill for 5 minutes. Flip each patty and grill for a further 3-5 minutes, until internal temperature is 160°F (71°C).
- If you are adding cheese to your burgers, do this during the last 2 minutes of grilling so that the cheese has a chance to melt.
- Remove the burgers from the grill and allow them to rest for 5 minutes before serving
- While the burgers are resting, add canola oil to cast iron skillet and place on grill grates, directly over heat
- Add onion slices to the skillet and cook until they start to caramelize, about 3-5 minutes
- Optional: While onions caramelize, place buns on grill grates. Toast on outside for 1-2 minutes
- Assemble your burgers with caramelized onions and your favorite toppings. Serve and enjoy.