Meat curing at home is a lot easier than you think. Learn how to prepare pork sausage or ham for barbecue smoking with our guide to curing meat with salt.

Meat curing is a food preservation and flavoring technique that relies on salt. Thanks to the powers of osmosis, salt placed on the surface of uncooked meat draws moisture out, slowly drying the meat.
What is meat curing?
Without water, dangerous microbes can’t populate the muscle tissue. That means cured meat is safe to consume even though you haven’t heated it.
Though you can technically use salt alone to cure meat, many people choose to add sugar, nitrites or nitrates, and other flavoring ingredients.
Celery powder is a common additive for flavor. It’s also a natural source of nitrates and nitrites. Nitrates and nitrites, which can also be in your curing salt, give cured meat its standard pink color. They also enhance flavor and protect against botulism, a toxic bacteria that can be fatal to humans.
Sugar will reduce the salt’s bite, though the flavor of any cured meat is predominantly salty.
It also provides fuel for wanted bacteria if you’re curing and fermenting your meat as you would for cured sausages like pepperoni.

What salt is best for meat curing?
Salt is what protects you from harmful bacteria while curing meats, so it’s vital to use the right kind. Typically, coarse kosher salt works best, but make sure it’s not iodized.
Salt producers add iodine to their products to prevent health problems in consumers that come from iodine deficiencies. However, iodine leaves a strange flavor when you’re using large quantities.
Along with kosher salt, you can use curing salts. Curing salts have some form of nitrites or nitrates mixed into them. The most common form is pink salt, or Prague powder, not to be confused with the popular pink Himalayan sea salt.
Several purveyors sell pink curing salt or Prague powder under numerous brand names. Some of the most popular are Instacure Salt No. 1 and No. 2. They’re easy to use; just follow the manufacturer’s instructions for amounts.
With the added nitrites in pink curing salts, you’re safe from botulism. That said, many chefs recommend using pink salt in small amounts while relying primarily on kosher salt.
That’s because nitrites in large quantities are bad for your health. Using a small amount of pink salt gives you the anti-botulism benefits without packing a massive nitrite punch.
What environment is best for meat curing?
The best environment for curing meats is around 55 degrees Fahrenheit with about 70% humidity. Ideally, it will be dark.
An unplugged fridge with a small pan of water inside works well if you happen to have one lying around. Though, a corner of your basement would be suitable too. You can even hang it in your unlit fireplace!
Regardless, the best way to be sure your environment is on point is to test it. Use a hygrometer and thermometer to check temperature and humidity before you begin curing your meat.
If you can’t find a suitable area in your home, you can always purchase a curing chamber. They range in price from $200 to upwards of $5,000 or more, depending on what you need. You can also create a chamber yourself; it typically won’t cost more than a few hundred dollars, plus your time.
If all that fails, you can also cure meat in your regular refrigerator. Your fridge is probably a little too dry and too cold, though. That means the curing process will go faster.
Though fast curing sounds like a benefit, it might not be. A faster cure means there’s less time to develop the mature flavors we expect to find in cured meat.
What meat is best for curing?
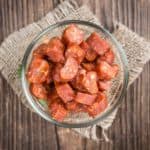
You can cure any meat, but the most popular cuts come from pork. Prosciutto, for example, comes from a pig’s hind leg. Salami is also pork-based, as is Spanish chorizo and pepperoni.
As you can see, you can cure entire cuts of meat, as is the case with prosciutto. Or, you can cure meat in sausage form, like you would with salami or chorizo.
Whether you use ground meat or a whole cut, though, it’s crucial to pay attention to the quality. If you use poor quality meat for curing, you’ll have poor quality results. Locally sourced or wild game tends to work best; in other words, get to know your local butcher!
How to cure meat with salt
Learning how to cure meat is easy, but there are a couple of different techniques. Below we provide step-by-step instructions for both dry curing and equilibrium curing.
Dry curing
Humans have been dry curing meat for centuries because all you really need is salt!
Equipment and Ingredients Needed
- Meat of choice
- Kosher Salt
- Curing salt
- Seasonings
- Curing space or chamber
- Cheesecloth
- Butcher’s Twine
To dry-cure meat, you don’t have to weigh it, but you should. Weighing the meat will help you determine when it’s ready to eat!
After weighing, cover the outside of the meat in salt. You can add seasonings at this point if you want to, but usually, people add them later on.
Submerge the meat into a large container and bury it in more salt for twenty-four hours. Then move on to the “next steps” section below.
Equilibrium curing
Equilibrium curing relies on modern technology, at least in small parts. You need a vacuum sealer and fridge access.
Equipment and Ingredients Needed
- Meat of choice
- Kosher Salt
- Curing salt
- Seasonings
- Curing space or chamber
- Vacuum Sealer
- Cheesecloth
- Butcher’s Twine
To equilibrium cure your meat, you have to weigh it first. Then, measure out 3% of the meat’s weight in salt. Apply the salt to the meat’s surface in an even layer. Finally, vacuum-seal your creation and place it in the fridge for five days.
Next Steps
Once the meat is semi-dehydrated from either method above, remove the meat from its salt bath or vacuum-sealed wrapping.
Brush off any excess salt (you can leave a little, just not too much). Then, apply your desired mix of salt and seasonings.
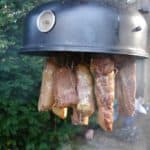
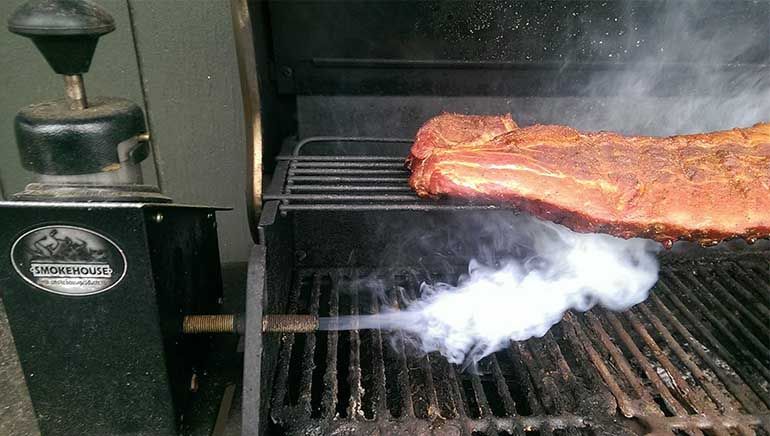
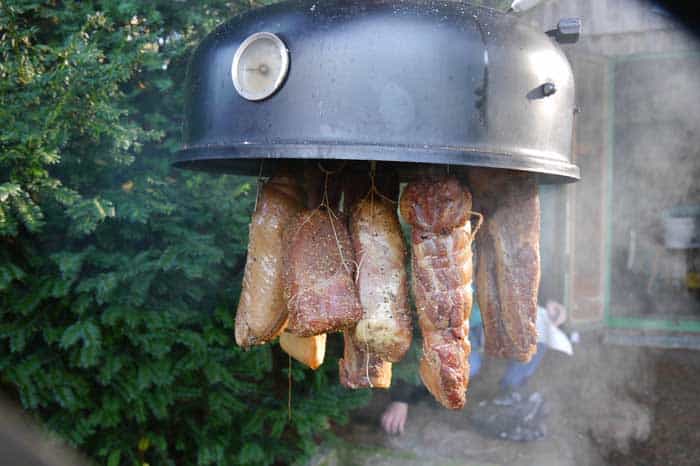
Next, wrap your meat in cheesecloth and hang it in your curing chamber or designated area. It needs to hang to encourage airflow on all sides.
If you don’t have cheesecloth, you can use butcher’s twine. As the meat hangs, the cheesecloth or twine will also help it hold its shape. That should make for easier carving later on.
Curing sausages
Though the process is similar, curing sausages comes with a few quirks, mainly because you’re using less salt and more good bacteria to combat the microbes that can make us sick.
Typically cured sausage recipes will include a bacterial culture which you add to the ground meat. Then, you’ll stuff the ground mixture into casings.
Next, you’ll weigh the sausages. Be sure to record the information somewhere; you need the initial weight to determine when it’s ready to serve.
After that, you’ll hang the sausages in a warm environment. Known as the incubation period, the warm temperature encourages bacterial cultures to grow. Eventually, the sausages will reach a pH level that protects them from harmful microbes. Your specific recipe will tell you how long that takes.
Once you’ve incubated the sausages, you can hang them to dry just like you would a whole cut of meat. Monitor them regularly to ensure good mold growth.
You should see white, chalky mold growing along the outside of the sausages. You shouldn’t see any black, green, or fuzzy mold, all of which may indicate a problem.
Warning signs
Foul odors are never okay during the curing process. If you notice one at any point, it means unwanted bacteria are beginning to colonize. Unfortunately, there’s no salvaging the meat at that point.
Usually, this happens when you miss covering a portion of the meat with salt. That’s why you should never be stingy with your salt! Always use enough to cover the meat completely, and you won’t have a problem.
As mentioned above, cured sausages should grow helpful, white, chalky mold while curing. This mold grows on the casings and shouldn’t penetrate the meat. If you cut into a cured sausage and see evidence of mold inside, especially if it’s black or green, throw the link away immediately.
When is it ready to serve?
Typically, you want the meat to lose somewhere between 35-40% of its initial weight. So, the best way to tell if your meat is ready to serve is to weigh it.
You can use the following formula to assess your cured meats:
Initial Weight of Meat x 0.65 = Goal Weight
For a smaller piece of meat, like a duck breast, this will only take a few days, maybe a week at most. For a larger cut, however, this can easily take five months or more.
The longer it takes for the meat to cure, the more mature flavors it will develop. To get the right flavors for prosciutto, as an example, you need at least 400 days. Top-end prosciutto, though, takes upwards of three years!
That’s why curing meat in a standard fridge doesn’t work as well as a basement or curing chamber. The low humidity in your fridge speeds the curing process and doesn’t leave enough time for flavors to develop.
Once the curing process is complete, it’s time to taste your creation. Use a meat slicer to get razor-thin pieces, then serve, and enjoy!