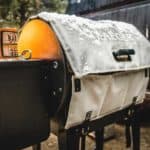
If you are one of the rare breeds of people who don’t mind getting their hands dirty and are looking to build your own grill, a Santa Maria Grill is a good choice. One of the things that stop most of us from doing this is a lack of information and skills. Doing it without a good guide will often feel like shooting in the dark.
This article will pull you out of that darkness. You should have your grill good to go in no time. Before you delve into it, let us start with the basics.
What is a Santa Maria grill?
The Santa Maria grill originated in Argentina. You will find the city that lends this grill its name in the Argentine province of Catamarca. In that region, it is just a regular grill. You will often find it referred to as an Argentine grill. Those that have exported the idea gave it the name that we know it by. So, what is this grill?
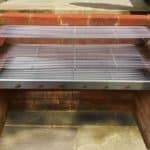
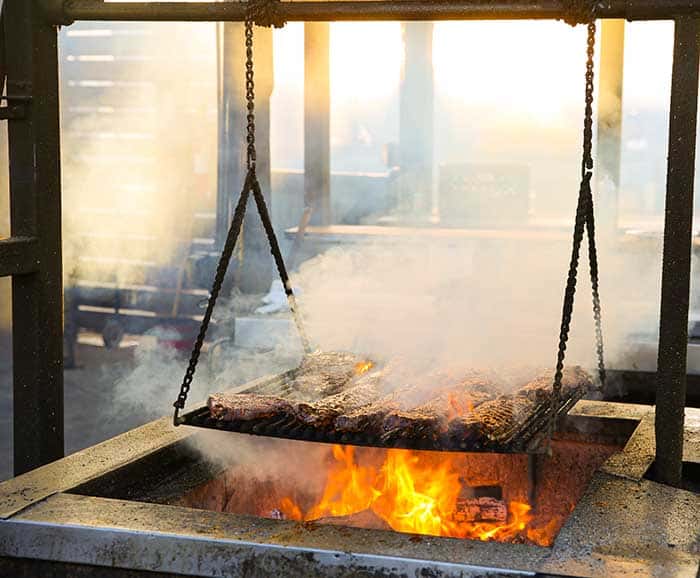
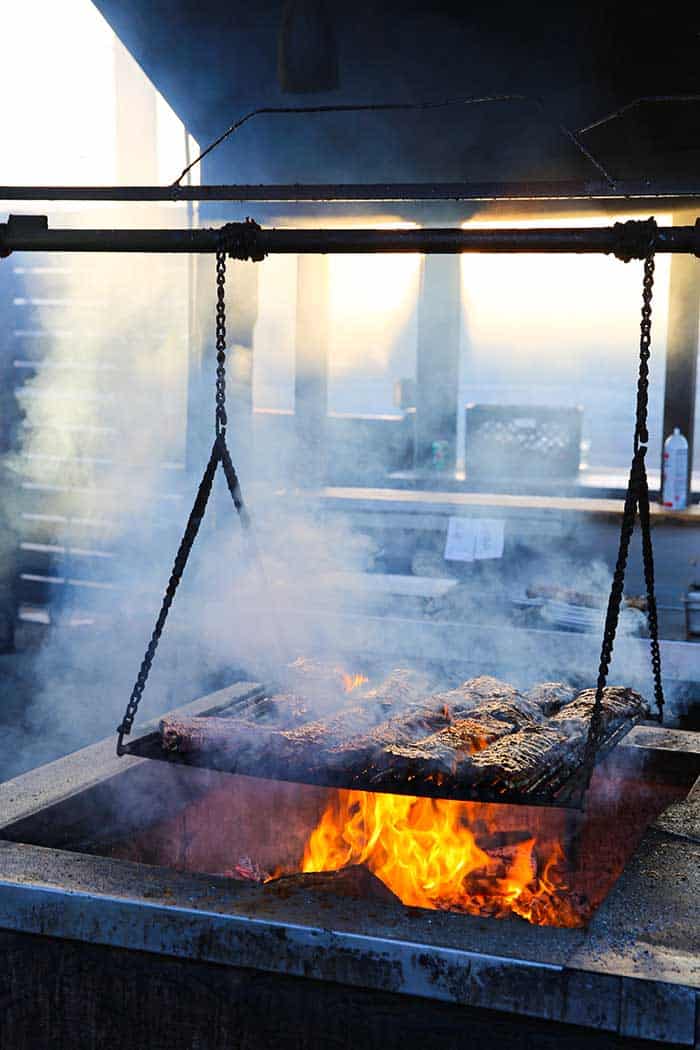
A Santa Maria grill is an open frame grill that is famed for its heat preservation and the mobility of the grid on which the meat is placed. It has a rotating chain system that allows you to lower and raise the meat. This is a handy feature when dealing with unpredictable flames. You can raise the grid when the flames are roaring, and lower it down as things settle down.
This mechanism is what has made the grill popular for smoking tri-tip. The beef cut is notoriously difficult to get right due to its low fat content, meaning it’s easy to overcook. The pulley mechanism makes it easy for users to react to heat fluctuations and pull the meat away or closer to the fire.
It is the above-mentioned system that makes the results exceptional. There are fewer chances of burning your steak on a Santa Maria grill in comparison to most other grills.
How does a Santa Maria grill work?
Most Santa Maria grills come in a rectangular shape. They have 2-3 layers on the inside. A two-layer system would have a layer for the firewood and another one for the meat. The three-layered variety has an additional layer that is used as a fat collection tray, which would also double as an ashtray. This often makes the cleanup process a little bit easier.
It can either be 3 or 4 sided. A 4 sided Santa Maria grill requires the grid to remain lifted as the fire is set and allowed to settle. Once settled, the handle is turned to place the meat above the heat at the required distance. The 3 sided version allows you to move the firewood around while the grid is lowered.
How to build a Santa Maria grill
To build your grill you will need to have Santa Maria style grill plans. These will detail the items that you need as well as the steps that you should take to build it. Not to worry, we will give you a step by step guide on how to get your homemade Santa Maria grill built.
What you will need:
- A welding machine
- Metal cutter
- Protective helmet and face shield
- Clamps
- Measuring tape.
- Metal sheets (Sheet Metal, at least 6mm thick)
- Stainless steel mesh/net
- Metal table legs
- Metal rods
Before purchasing any of these supplies it is important that you decide the size of your grill. You can do most of the planning on a piece of paper to make the process as foolproof as possible. The first decision that you have to make is whether you want a closed in flame or one that is somewhat open.
There are advantages and disadvantages to this. Having 4 sides to your grill means that the heat is fairly controlled which will result in higher temperatures than you would get if you had 3 walls.
Going with 3 walls grants you ease of access to the wood and the insert without having to move some things around. Seeing as there is a good system built into the Santa Maria to facilitate ease of access, this may not be such a big problem. Turning the crank handle will lift up the Santa Maria grill insert.
Step 1: Measurement
Use your measuring tape to measure the length and width of your metal sheets. Make clear marks and lines on the sheets to show where you would like to cut the sheets to the size that you want to build.
You can start by measuring and marking the base of the grill. Once you have the base in place, measure the sheets that will make your length/s and widths.
Step 2: Cutting
Using the lines that you marked in the previous step as a guideline, use your metal cutter to trim the sheets down to size.
You will also need to create grooves in which the layers of the barbecue will sit. Use the measurements of the grid’s thickness to figure out how wide these grooves ought to be.
Step 3: Welding
Starting with the long sheet/s, place it on the edge of the base. Take a moment to ensure that the edges are perfectly aligned. Once you are satisfied with the alignment, begin welding them together. Weld the corner, center, and the other corner, in that order.
Do the same for the rest of the sides.
Step 4: Get the legs in place
The legs are another welding job. You can either do them at this point with the grill flipped over or make this your 3rd step. In the latter option, you would weld the base sheet to the four legs before welding the sides of the grill onto it.
Step 5: Rotating Mechanism
Weld two rods of equal length to either side of the grill. You want to make sure that this is centered. This is where the rotating rod will be anchored. It can be strengthened by creating a triangular structure. In which case, you would weld supporting points on either corner of the barbecue.
The newly anchored rod will have the chain attached at either end of it. One of the things to be mindful of when working with the chain is the length. It should be long enough to be rolled down towards the flame and safely back up. Some thorough weight testing is of paramount importance here. This will put through its paces as you use your grill.
Safety precautions and features
The final part is to get the safety right. Sharp edges pose the greatest danger. They should be sanded down. The handle for the rotating mechanism will likely heat up as you barbecue. To make it safer, it should be insulated. Wood can be placed over it for this purpose. We have already touched on the chain. Ensure that the chain is well welded. Pressure testing should be carried out just to be sure.
Conclusion
Although there are several steps involved in building a Santa Maria grill it can certainly be done. If you are not as experienced at welding and other related skills, you will want to allow additional time for this project. A diagram will go a long way. If you can get your hands on high-quality tool, it will make your life easier. All the best with your project.