Build your very own BBQ island with steel studs the easy way. Our step-by-step guide will show you everything you need to know to get your outdoor metal frame planned, prepared, and set up. Tracks, dimension, and building techniques for the best grill structure.

If you’ve ever felt like you’ve outgrown either your indoor setup or your existing outdoor BBQ kitchen, then planning your own outdoor BBQ could be the way to go.
Rather than spend thousands of dollars on outside help, you might be entertaining the idea of doing it yourself and bringing your own DIY BBQ island ideas to life..
This isn’t as crazy as it sounds though. Steel studs have helped thousands of BBQ fans build their very own customized constructions. These act as easy-to-assemble frames to build the skeleton of your island, and can easily be purchased from stores and online retailers.
Here’s how to get going.
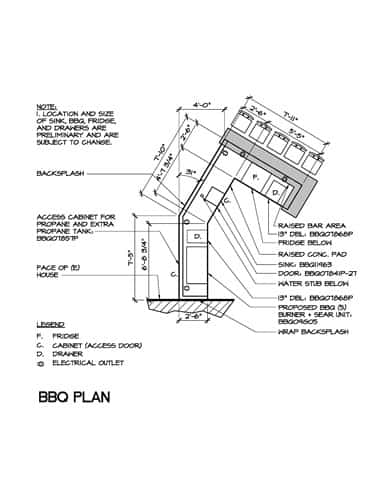
Planning & Dimensions
Fail to prepare and prepare to fail. Before you get carried away with buying your parts, or even fantasizing about your dream built in grill, you need to properly plan your new set-up.
This includes measuring out the exact dimensions of your cooking area, and what you want to include with your grill. This could be extra features like a sink, cabinets, or drawers. Once you decide on this then you should be able to start to get an idea of how much space you’ll need.
A lot of hardware stores and suppliers offer comprehensive dimension guides for all their products, which will let you know the exact dimensions you will need.
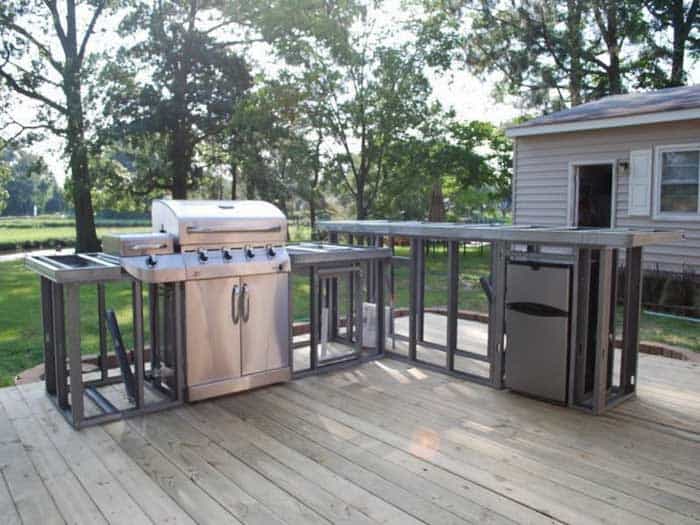
Here are some amazing examples of BBQ island plans to help you get a sense of what you can expect.
Whatever you decide, be sure to double and triple-check your dimensions. It can’t be overstated how important it is to catch mistakes at this stage, rather than find out as you’re close to finishing up
BBQ Island Tools
A lot of tools for this project will be similar to any other: For example, levels, hammer drill, screwdriver. However there are a few that are more specialist and specific to setting up steel studs.
These are:
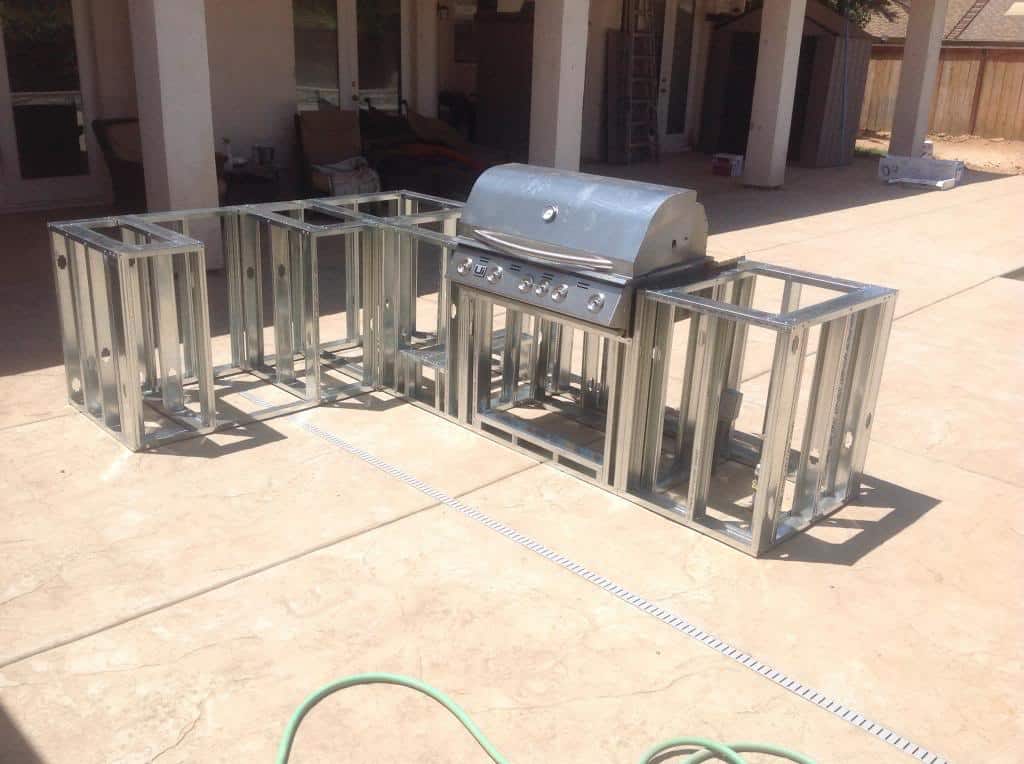
Steel Studs & Tracks
The main body of your structure will be made of two key components: The studs and the tracks.
While they are different in structure, the easiest way to think of them is that tracks largely form the horizontal elements of the structure (they ‘track’ along the ground), while the studs mainly operate vertically.
You will need to carefully plan both to ensure that you get the right amount of each. Too few and your construction will be weak, too many and it’s needless wasted cost.
As a general rule, a lot of people try to use 1 stud for every 12 inches of horizontal structure. This works well for forming the walls of your island structure, and helps provide a good amount of coverage.
The most popular form of stud is 25-gauge, and available from most good hardware stores or online retailers. They can be cut to length, or come as part of a pre-designed kit.
You can find some here on Home Depot
Lay Down Composite Boards
Using your plan as a guide, you will need to use composite board to lay out the shape of your island. This has a practical advantage of helping you guide you through construction, but it will also help keep your entire structure level and sturdy, as well as helping to reduce damage to the metallic frames.
Lay Down the Tracks
Now we’re getting into the build.
Our island build starts with the lower tracks. Lower tracks are larger than the main steel studs and can hold a lot of weight, so they are perfect for forming the foundation of our island, and help to create a firm base on which to build the remainder of it.
Position the tracks along the perimeter of the composite to form the lower part of the frame. For the longer sides of your island, allow your the tracks to overlap by about 6 inches. This should ensure that your island stays stable.
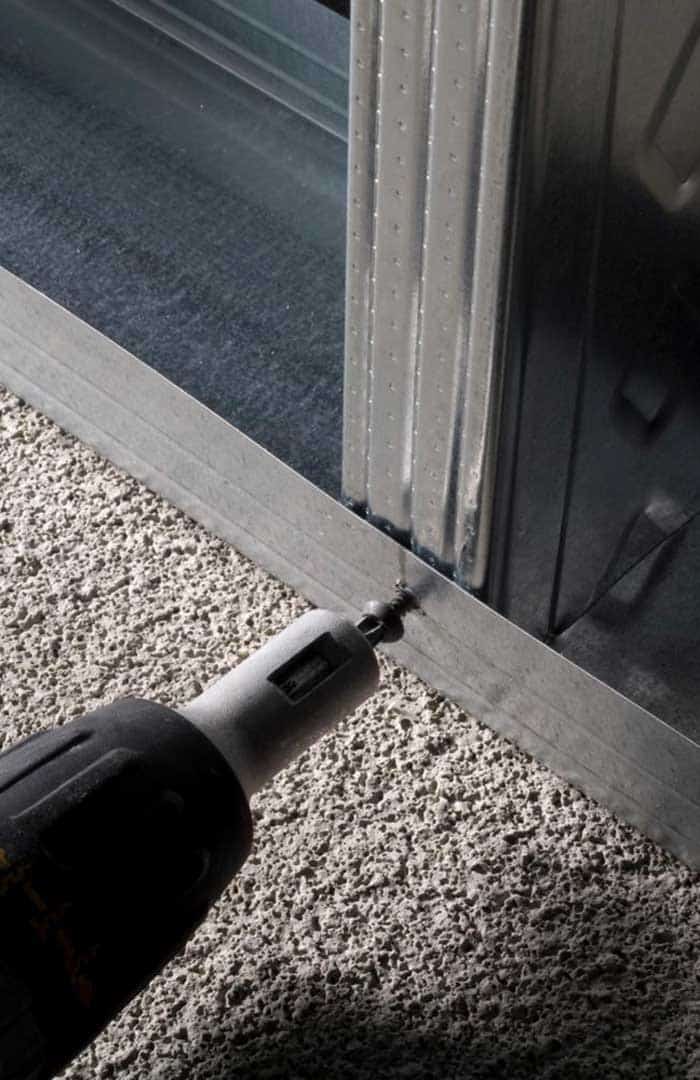
Fix your tracks to the composite boards by drilling it in each corner of the tracks. Many stud and track kits come with holes for easy fixing, but if you have bought separately then you may well have to drill these holes into place yourself.
Level or Plumb the First Track
Getting the lower tracks right will determine the success (or failure!) of the rest of your island, so once these are in place take the time to ensure they are straight and level.
You can do this using your choice of a plumb bob, a laser level, or simple spirit level. If you’re looking to buy any of these, I’d recommend a laser level. They tend to be easier to use, and much more efficient.
If you find that any point of your lower track is uneven, then you might need to fasten it to the composite board tighter at one end.
Join the Studs to the Tracks
Now it’s time to start building vertically. The best approach here is to go section by section, so focus on one end of your structure for you to begin installing the studs.
Insert your first stud into the track by first aligning it so that the shape of the hole in its face is pointing downwards. Pace the end of the stud in the track so that the edges of both are perpendicular.
Turn the stud 90 degrees so that the stud slots into the track, with the face of the stud facing outwards and the flanges facing inwards. This should form a corner.
Use your c-clamps to hold the stud in place, and use your spirit level to ensure that the stud is vertically straight. Screw the stud into place, locking it to form a corner with your track. Once you have screwed both sides, and have checked that the screws are secure, remove the c-clamps. Repeat the process for the stud on the other end of the track.
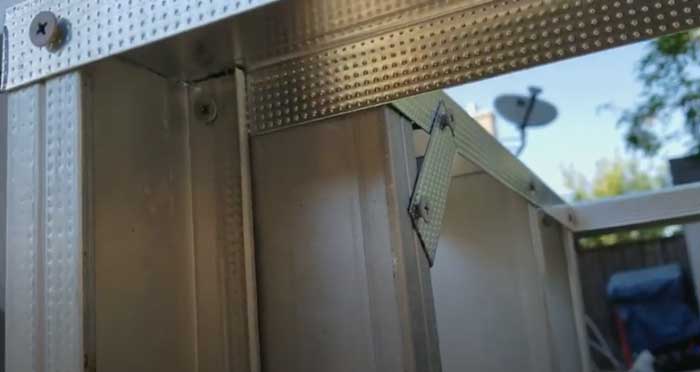
Attach the Top Track
Now that we have the bottom and side parts of our frame, we can attach the top track. Twist the ends of the studs very slightly to fit them between the flanges of the track. Set the track so that it forms a perfect corner on each side.
Use your c-clamp to fasten the track on the stud at one end. Crucially, before fastening the other side, use a spirit or laser level to make sure the top track is level. If it isn’t, you might need to readjust it at the loose end.
Once it’s straight, use your tape measure to compare the lengths of the bottom end of the structure against the top. If there is a difference then you will need to readjust how the studs are set against the top track.
Once you have made sure that the top track level is straight, and that the top end of the structure matches the length of the bottom, use your c-clamps to fix the other end of the track. Screw the four corners of the track with your drill.
Fit in Your Smaller Studs
To add more structure and stability to our island, we need to fix in an additional stud inside the frame. We do this with our shorter studs.
Using your tape measure, measure exactly halfway horizontally along the frame and mark it. Do this for both the lower and top tracks. Simply insert your stud at an angle to allow it to fit between the flanges of the tracks, and then rotate it so that it slots into position. Align it with your markings and fix it your clamps, and drill to secure it.
Build Out the Structure
Now that you have your first part of the stud structure complete, you can start to build out the rest of it. Be sure to do it carefully bit by bit, always checking that your island is level using a spirit or laser level.
Set Up the Electric Cables
Thread the cables through the holes/knockouts of the studs. I recommend lining the holes with plastic bushing or ties. This will help prevent any damage to the cables from the sharp edges of the holes, particularly if the cables will be rubbing against the edges.
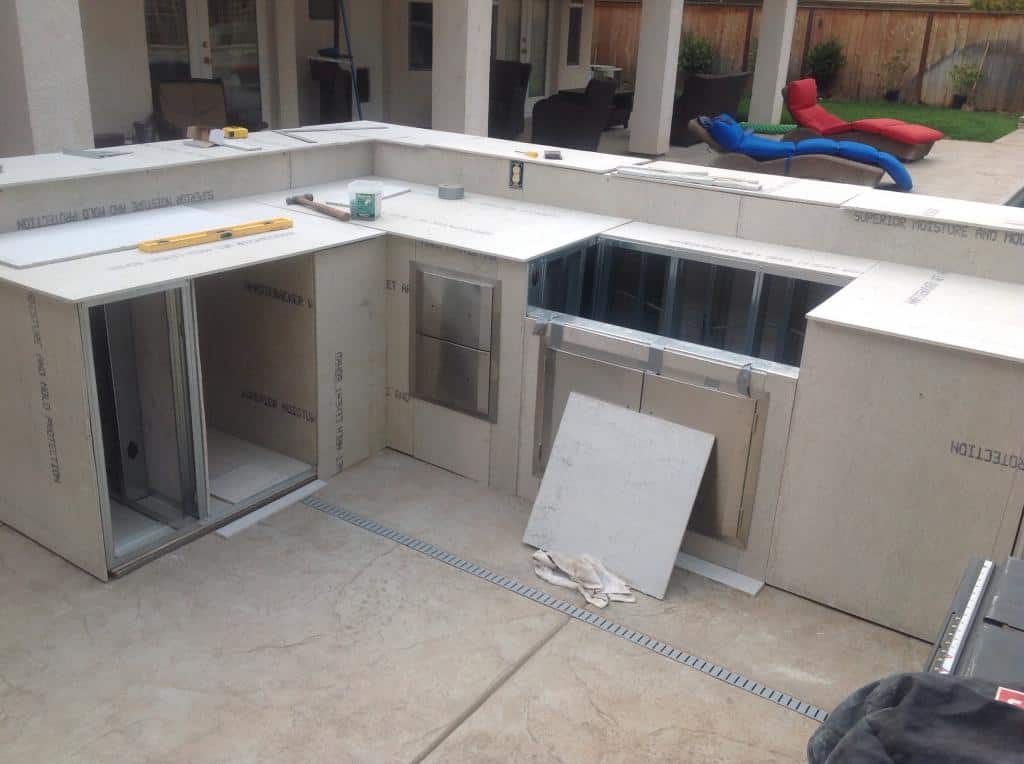
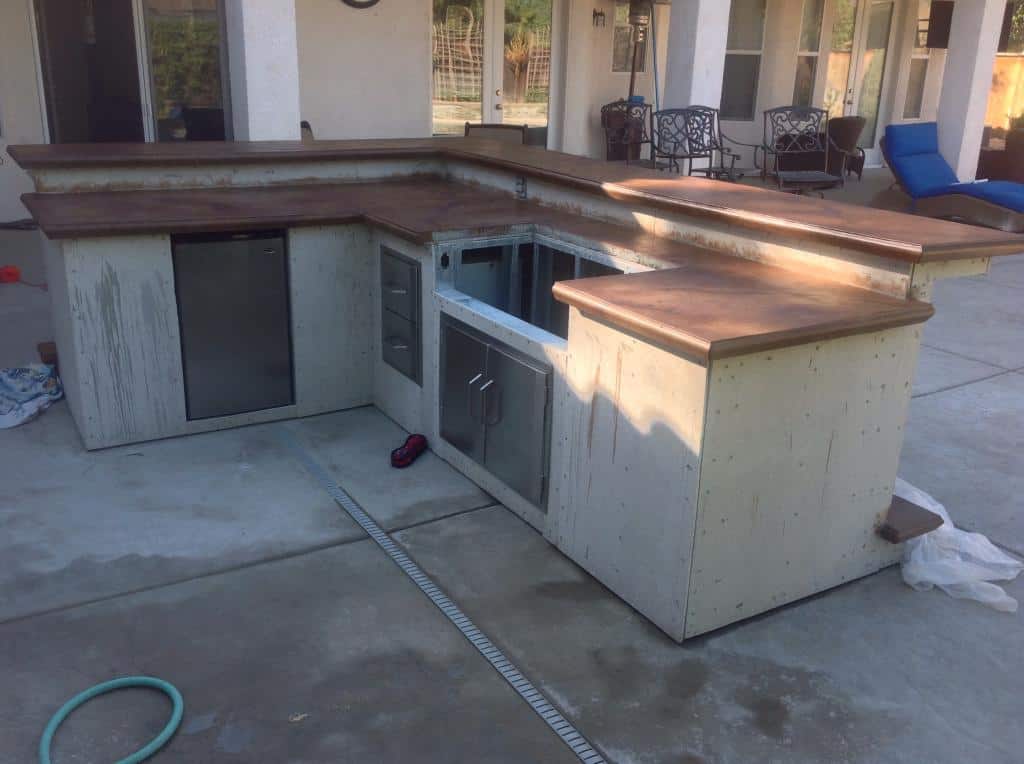
Install Panels and Counters
Ideally you would use concrete for this, but if you need something cheaper then plywood or wooden panels are also a good fit. Just bear in mind that they won’t be as weather resistant as concrete.
For counters, I recommend opting for granite.